


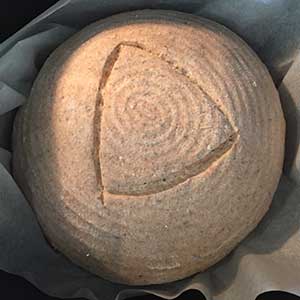
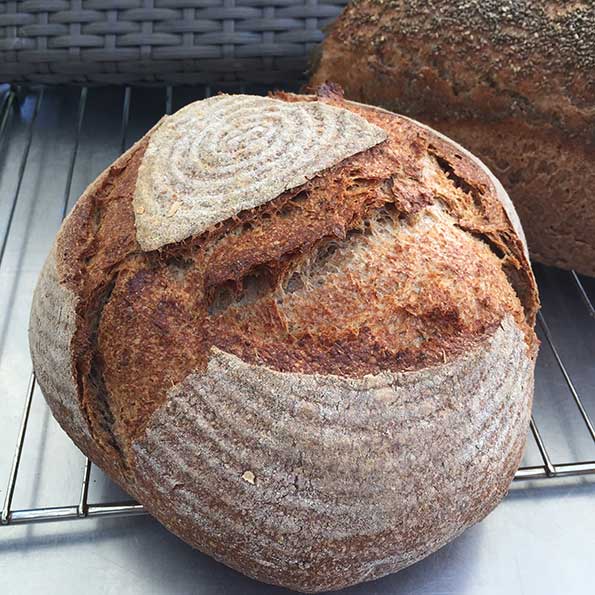
Almond chia spelt ‘express’ loaf
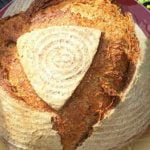
What could be better than the smell of freshly baked bread…well, frankly, freshly baked sourdough bread made by your very own hands! This recipe is based on one of the favourite sourdough breads in my third book, Wild Sourdough By Hand. I have used homemade almond milk to add softness to this already moist and ‘light’ loaf. I prefer to use Australian grown black chia seeds but white chia is fine too. The crumb has a deep caramel brown colour due to the use of wholemeal spelt flour, and is studded with tiny black specks of chia seeds. This loaf will rise faster than the basic loaf as it has double the amount of starter. Start the night before to soak the chia seeds and activate the starter culture. If you don’t already have a starter culture, you can make your own or purchase my 35+ year old starter culture from the online shop.
For those of you on a FODMAP or low GI diet this bread may be suitable for you, but consult your health practitioner for advice.
Loaf, Almond Chia Spelt
Ingredients
- 300 g sourdough starter (see below)
- 250-275 g almond milk
- 140 g chia seed gel (see below)
- 300 g wholemeal spelt flour finely milled if possible
- 300 g white spelt flour
- 2 tsp Sea salt finely ground
- chia, sesame or poppy seeds optional topping
Starter
- 50 g sourdough starter
- 120 g wholemeal spelt flour
- 180 g filtered water
Chia Seed Gel
- 20 g chia seeds
- 120 g filtered water
Instructions
- Sourdough starter - Activate starter 6-12 hours prior to making dough. Whisk/Stir well and leave covered in the warmest spot in your house, but not in direct heat. Use when bubbly
- Chia See Gel - In a clean jar with a lid, add the chia seeds and water, stir a few times to make sure the seeds are well distributed in the water. Soak for 6–12 hours.
- Measure ingredients - Beginning with the starter, weigh and place the wet ingredients into your bowl. Then weigh and add the dry ingredients, adding the salt last.
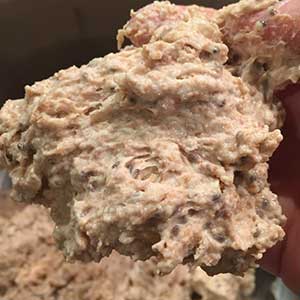
- Mix ingredients - Mix with a strong spatula or a small scraper until well mixed. The mixture will look dry at the beginning but the final dough mixture will look slightly wet and homogeneous

- Rest - Turn your bowl upside down and let the dough rest for 15-20 minutes.
- Knead - Put your dough back inside the bowl and knead your dough using the air kneading technique. The resulting dough may stick slightly to your fingers, but it should not be overly wet.
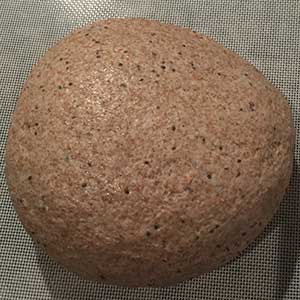
- First rise - Unload the dough into a container with a lid or inside a freezer bag to rise for 1-2 hours in a covered container at a comfortable room temperature, around 20–25°C (68–77°F).
- Stretch and fold - Stretch and fold your dough two or three times (and no more than three times). Your dough will feel taut.
- Rest - Let the dough sit for 15–20 minutes to relax the gluten.
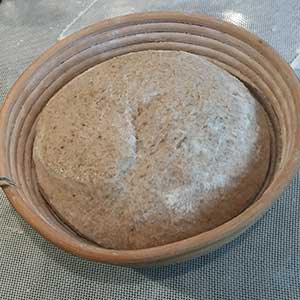
- Divide and shape - Shape the dough into a ball and put it into your medium tin or floured banneton. If your tin is uncoated please brush tin with coconut oil and line with baking paper.
- Final rise/double the dough volume - Rise the shaped dough at a comfortable room temperature, around 20–25°C (68–77°F), until almost doubled. This will take 3-5 hours or longer if your room temperature is colder. Mist dough with water using a water spritzer then cover with a sheet of freezer bag or put it in a covered container. Mist with water frequently to prevent drying. Sprinkle with chia, sesame or poppy seeds if desired. Preheat your oven to 235°C (455°F) when your dough is almost doubled.
- Bake - Bake for 10–12 minutes at 235°C (455°F), then reduce the oven to 205°C (401°F) for a further 20-25 minutes. If you are unsure if the loaf has cooked through, turn the oven off, and let it sit for 10 minutes. Or insert a thermometer, the inner temperature of the dough should be 90°C or higher. Remove loaf from the oven, unload to a cooling rack taking care not to burn your fingers!
- Rest - Let the bread cool before cutting. Suitable for freezing and will keep for a couple of months frozen.
Notes

What Equipment you need:
- Loaf Pans
- Proving Basket
- Stand Mixer
- Scales
- Mixing Bowl
- Spatula
- Dough Scrapers
Leave a Reply